Setup
Setting up a custom domain with Namecheap and pointing it to your Cloudflare DNS is a straightforward process. Whether you’re hosting a website, web app, or any other service, managing DNS through Cloudflare offers better performance, flexibility, and security.
In this guide, you’ll learn how to:
- Register or use an existing domain from Namecheap
- Point your domain to FluentSync Solutions by updating Namecheap’s nameservers
- Confirm the domain is correctly configured
Step 1: Log in to Your Namecheap Account
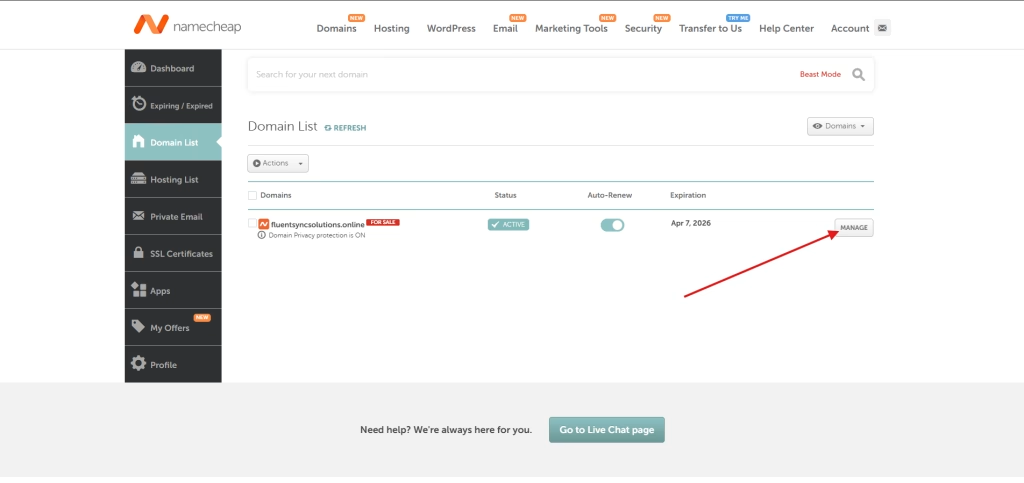
- Visit https://www.namecheap.com.
- Log in using your Namecheap credentials.
- Navigate to the Domain List on the left sidebar.

Step 2: Select the Domain to Update
- In your Domain List, find the domain you want to update.
- Click the Manage button next to that domain.
Step 3: Change the Nameservers to Cloudflare
- Scroll to the Nameservers section.
- From the dropdown menu, choose Custom DNS.
- Enter the following Cloudflare nameservers:
bjorn.ns.cloudflare.com dee.ns.cloudflare.com

- Click the green checkmark to save your changes.
⏱️ Note: It can take anywhere from a few minutes to 24–48 hours for the DNS changes to propagate globally.
Final Thoughts
Once your domain is connected to Cloudflare, you can:
- Access your wordpress solutions and will opt you for registering your username and passwords.
- Replace {your.domain to your domain} https://your.domain/wp-admin/
Leave a Reply
You must be logged in to post a comment.